Labels

Tuesday 20 December 2011

How to Decoupage & The Napkin Technique

Hello my wackys, today I'll talk about decoupage a little bit more, I'll give you the instructions and hope fully you'll see how easy it actually is and will do some as well don't worry if it doesnt come out like you visualized it on the first time, like I always say, practice makes perfect, so lets get practicing.

The art of decoupage is quite a straight forward process, involving cutting out a print, arranging a design on your chosen object, gluing it down and varnishing it. The idea is to get a smooth surface to your work, with the paper embedded in layers of varnish. You will find you quickly gain confidence with each project successfully completed. If this is the first time you have attempted decoupage, choose a simple design, without too much intricate cutting, so that you can concentrate on the technique, and the project will be finished much more quickly! Take care over your choice of colour scheme and design, as this will greatly enhance your finished item. For me, the pleasure of decoupage lies in the design, which can be as simple or complex as you decide. The more you do, the more ideas you get. But beware, decoupage can become addictive!

You will need:
  • An item to decoupage
  • Some printed paper designs, e.g. scraps, wrapping paper, wallpaper, cards, old calendars, prints etc.
  • PVA glue, for gluing, and can also be used diluted for sealing prints.
  • Sanding sealer, for sealing prints that have been hand coloured, or where printing on the reverse might show through - Acrylic primer/undercoat, for sealing bare wood.
  • Emulsion paint for the base coat
  • Acrylic paints or coloured pencils for colouring prints (if required)
  • Water based varnish
  • Polyurethane varnish (optional, but recommended for items subjected to wear and tear)
  • Paint brushes, various, for applying glue, paint, and varnish
  • Sandpaper


How To:
  1. Prepare the item to be decorated, using the acrylic primer/undercoat.
  2. Paint, using emulsion paint in your chosen colour. 2 coats may be needed. Sand lightly between coats. Leave to dry.
  3. Cut out and arrange your prints on the item. You can use blue tack to hold them in position. If you are using hand coloured prints, seal them with diluted pva, or sanding sealer, prior to cutting.
  4. When you are happy with your design, glue in place, using either pva glue, or wallpaper paste. Use a damp J cloth or paper towel to smooth over the surface. This ensures that the paper is properly stuck, and no air bubbles are left under the paper. Wipe away excess glue, and leave to dry over night.
  5. Begin varnishing, using water based varnish, allowing at least 2 hours between coats. Apply 5 coats before sanding down, to prevent damage to the paper. After sanding down, varnish again, sanding after 2 coats. Continue in this way until you are happy with the finish. (As a guide, 9 coats are normally sufficient, but this depends on the thickness of paper you are using).
  6. At this point you may decide that your project is finished. If you wish, you can lightly sand, and apply 2 coats of polyurethane varnish. Leave to dry overnight and sand lightly between coats. This will give a harder wearing surface. When the varnish is dry you can also wax polish, if desired. This gives a mellow sheen, and depth to the surface.
The Napkin technique:

http://www.youtube.com/watch?v=8jFVoKKRDnY


Sunday 18 December 2011

Tulle Christmas Wreath

  Hello my wackys, sorry for not posting anything in a while, but unfortunately I've been in a right state....  working nights and having to wake up at 7.30am to prepare my little ones and take I to school has been proving a bit more difficult then what I was expecting, mostly cause I can't really get that much needed sleep during the day has I have my nearly 2 year old with me all the time...

Anyway has a redemption today I'll be posting an How to Tulle wreath its reaallly easy ... I really mean reallllllyyyy EASY PEASY.

Here's a picture of the finished project ( still haven't taken it my camera has been acting up lately)

Anyway, all you need is red and white tulle or any colour you'd like I used red and white cause that's my them this year a Styrofoam ring and some ribbon to make the hanging bit.

 So what you do is roll up the tulle and cut it in equal parts, you can make it has fluffy has you'd like for more fluffiness just let the straps long if not just cut them to the size you'd like; after cutting all the tulle start putting it on the ring and give a not (x2) now just inter scale it (meaning: red/ white/ red/white etc.) all around.

 For the hanging bit just grab some ribbon and and do a not in the middle and one on top.

Now I left mine quite simple, but you could also ornament it by making some hearts /stars/ Christmas trees etc. with polymer clay and put them into place with the help of a hot glue gun.

Hope you like it.

See you soon my wackys, here's just some taster pics for you to have an idea.

Sunday 11 December 2011

Christmas Tree Ornaments/ Decorations

Hello my wacky, hope you're having a wonderful Sunday.

Have you noticed?!!! Have you really?!! Christmas is almost here, my polymer clay order hasn't arrived yet and to be honest I'm quite crossed about it, plus I need the Styrofoam to make the Christmas wreath for my little girls school, I'm meant to do it has a raffle prise... but still haven't received all the materials; hopefully it will arrive before the 14th and there wont be any problem, fingers crossed .

Now because we're in a society where we consume more than ever before I'll try to help the environment and have fun at the same time... so, what 're you going to do you say.... well today me and the girls are going to cut some card out of the delivery boxes we get on our mail with some christmassy shapes, make a hole in it to pass the ribbon for hanging, cover it with pva glue and some sparkling glitter (oh how I love it , it makes everything look even better + its not that expensive).

 So here's some pictures for you to please your eyes:


Now for this one here, it doesn't have glitter has you can see, but how cool is that?!! It's a Christmas tree made out of an old magazine.

Cooooollll right here's the link if you'ld like to have a go at it:

" come on my wackys you surely know what I'm going to tell you don't you?!!! Yeah that's it ... Lets roll up our sleeves and lets get crafting"

See you soon   xoxoxoxoxox

Friday 9 December 2011

50 Fan Giveaway

Hi my wackys,

just to let you guys know that YOU could be the lucky winner and get a personalised 2012 diary simply by sharing this Wonderful page and helping us reach 50+ likes! So please click like, and perhaps have a peep at what we do list, maybe you'll find something you'ld like for you or for others....

Here's the link where you must click like http://www.facebook.com/pages/Lilis-handmade-crafts/222122387856497?ref=tn_tnmn, do it now and there is a great chance of you receiving your prize by christmas time.

The winner will be decided using a raffle method with all the 1st 50 names that clicked like on lili's handmade crafts facebook page. you will be noticed with a message on facebook requesting an address to where to send the item.

see you soon xoxoxox

Now, what are you waiting for, go on don't lose any more time, you could be the winner.

Christmas Food ''Turkey"

Hello everyone, how have you all been?!!

Great, well today we're going to leave the gifts asside for a minute and we'll have a little talk about food (yeihhh you say), who in the whole world can spebd without it no one, and in the festive times it is definitely one of the most important things ever.

A celebration is always a good excuse to show of your cooking sills and play the part has a host and at the same time you'll be enjoying youself and socialising with the ones you care the most.

So over here I'll leave a couple of tried and tested recipes, that were much loved at my household, and hopefully you'll like it too.

Whisky stuffed turkey (by tesco )

100g butter, softened
1 large turkey (3.5-4kg), cleaned and patted dry
small bunch of thyme sprigs
2 large eating apples, pealed and cut into wedges
salt
pepper


  • For the stuffing

  • 25g butter
    750g sausage meat
    175g natural breadcrumbs
    200ml whisky
    1 onion, finely chopped

    20 mins to prepare and 3 hrs 00 mins to cookTakes: 20 mins to prepare and 3 hrs 00 mins to cook
    Serves: 8

    Start by preparing the stuffing; melt the butter in a large frying pan over a moderate heat and sweat the onion for 5-6 minutes until it starts to soften. Add the whisky and increase the heat, allowing it to reduce by half. Remove from the heat. Combine with the sausage meat in a large mixing bowl. Add the breadcrumbs and seasoning and mix well with your hands until combined thoroughly.
    Pre-heat the oven to 200° C.

    Stuff the main cavity of the turkey with most of the stuffing. Shape the remaining turkey into a lightly greased loaf tin. Sit the turkey in a large roasting tray and rub with the softened butter. Season well and cover the turkey loosely with aluminium foil.
    Roast for 2 hours then remove from the oven, increase the heat to 220 degrees and discard the aluminium foil. Scatter the apples around the turkey at this point and dot with any remaining butter. Cook the remaining stuffing in the loaf tin at the same time as you return the turkey to the oven for 20-25 minutes.

    Remove both the turkey and the stuffing at the same time, covering the turkey loosely with foil. Let it rest for at least 10 minutes and keep the stuffing warm to one side as well.
    Transfer the turkey to a serving plate and place the thyme sprigs in the cavity where the stuffing is. Cut the stuffing from the loaf tin into portions and arrange around the turkey along with the apple wedges. Serve immediately.


    This recipe and photograph has been taken from the internet and is a tried and tested wonderfull, and flavoursome one, hope you lot like it as much has me. 

    see you soon
    xoxoxoxoxo


    Thursday 8 December 2011

    Chocolate Chip cookies mix Jar = gift

     Hello again, just one more jar that you can make, decorate and give has gifts, this jar will only take the dry ingredients obviously do don't forget to enclose the recipe with all the directions so that your loved ones/ friends don't feel lost in the process of making them, you could also give the jar of the mix with a wooden spoon attached tp it with some ribbon, and don't forget  the al so important decorated actrative label....

    So you see my wackys, the christmas time need not be a time where we go bankrupt I've been giving you some ideas and tips about what you could do and make, you can make little hampers out of these ideas, and believe me when I tell you that you're friends will be thrilled and will anxiously wait for what you'll give them next year :)


    Ingredients

    Serves: 18
    • 250g plain flour
    • 1/2 teaspoon bicarbonate of soda
    • 1/2 teaspoon salt
    • 170g unsalted butter, melted
    • 200g dark brown soft sugar
    • 100g caster sugar
    • 1 tablespoon vanilla extract
    • 1 egg
    • 1 egg yolk
    • 325g chocolate chips

    <><> <><> <><> <><> <><> <><> <><> <><> <><> <><> <><> <><>

    The how to: (you should include this on a decorated card or something ok?)

    Prep: 10 mins | Cook: 15 mins
    1.
    Preheat the oven to 170 C / Gas mark 3. Grease baking trays or line with parchment.
    2.
    Sift together the flour, bicarb and salt; set aside.

    3.
    In a medium bowl, cream together the melted butter, brown sugar and caster sugar until well blended. Beat in the vanilla, egg and egg yolk until light and creamy. Mix in the sifted ingredients until just blended. Stir in the chocolate chips by hand using a wooden spoon. Drop cookie dough onto the prepared baking trays, with each cookie around 4 tablespoons of dough (for smaller cookies, drop 1 rounded tablespoonful and adjust baking time as necessary). Do not flatten the dough. Cookies should be about 8cm apart.
    4.
    Bake for 15 to 17 minutes in the preheated oven, or until the edges are lightly toasted. Cool on baking trays for a few minutes before transferring to wire racks to cool completely.
    DRY INGREDIENTS JAR ASSEMBLY: first you'll had the flour, then the baking powder or bic. of soda,salt,the brown soft sugar,the caster sugar and finally the chocolate chips.

    After that comes the label decorating, either handmade or printed, the top cover and the recipe card, just don't worry to much about it, and be sure to have fun making this :)

    See you lot soon.
    xoxoxoxoxo


    make flavored sugar = gift

    Hello my wackies, how have you lot been?!

    Today I brign you another of the recipes for the gift ideas I gave you on a previuos post, so here it goes a few recipes to make yamy, gorgeous flavored sugar, hope you like it my sweeties.

    here's a few and you can use them  to flavor Coffee, Teas, Cakes, Toast, or use to sugar rims of Champange, Sweet Cocktail or Martini Glasses.

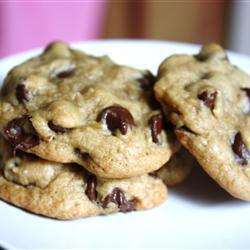
     You could also top Muffins or Cookies before going into oven. To make your sweet sauces! Makes great gifts! Give it a try in splenda if you prefer. I am not one for artificial sweeteners but if you prefer just give it a try.
    how long does it take? and what will you need :
    sugar and choice of flavour ingredient

    10 min | 10 min prep
    7 jars

    * 1 vanilla bean or 4 star anise or 3 cinnamon sticks or cloves or 1/2 teaspoon ground fennel or ground cardamom or 1-2 tablespoon dried herbs (mints, rosemary, lavender you get the idea) or orange zest or lemon zest or lime zest (your favorite citrus, 1/2 inch piece)
    * 7 cups sugar, about (or try it in splenda)

    1. Put sugar into Jars.
    2. Place vanilla bean, Star Anise,Cinnamon sticks, Cloves, Fennel, Cardamon, Citrus Zest and or herbs into Jars.
    3. You can put individually or mix and match your spices.
    4. Tightly close and store a week or more.
    5. Use as you wish!

    Make Flavored (or Scented) Sugar
    Source: Baking 911

    Flavored or scented sugar is made by placing vanilla beans, citrus peels and even crushed rose petals in the sugar for a short period of time, which flavors it. It is a great way to add subtle flavor to any recipe or to decorate cookies with. You can also stir it into your coffee or tea. In pretty jars, flavored sugar is great to give as gifts.

    CINNAMON SUGAR:
    1 cup sugar
    1 tablespoon cinnamon

    Mix to combine. You can use any spice or combination of spices. Yield: 1 cup

    VANILLA SUGAR:
    Vanilla sugar is simply white granulated sugar that has been flavored with a vanilla bean; there really isn't a specific recipe for it. The sugar keeps indefinitely and does not need refrigeration. Replenish sugar as it is used. The vanilla bean is good as long as it is fragrant, but I usually replace it every year in the Fall before Xmas baking. Vanilla sugar will keep indefinitely in an airtight container at room temperature.

    To make:

    Place a cleaned vanilla bean on a baking sheet and set aside until dried.

    Bury 1 dried vanilla bean in a container holding 2 cups confectioner's sugar, super-fine or regular granulated sugar.

    Cover the container tightly. The sugar will be sufficiently scented with vanilla to be used in a week or so.

    Add more sugar to the jar when you use some of it's contents; the beans will be effective for many months.

    Another way: To make vanilla sugar, place any cleaned, used vanilla beans on a baking sheet and set aside until dry. There is really no specific recipe for vanilla sugar. Any amount of granulated sugar will do. With less sugar, the vanilla flavor will be strong. I usually mix one vanilla bean with about 2 cups sugar. When the vanilla beans are dry, place them in a food processor with the sugar and process on high speed until the vanilla and sugar appear to have the same texture, about 1 minute. Pass the mixture through a fine-mesh sieve to remove any large pieces.

    If you don't have a food processor, you can simply place the dried vanilla beans in some granulate sugar and store in an airtight container. The sugar will take on the flavor of the vanilla. Another way to make vanilla sugar is to use the vanilla seeds. Use a sharp knife to slice the beans in half lengthwise. Separate the seeds from the skin by scraping the blade of the knife along the inside of the bean. Mix the seeds and some granulated sugar together in a bowl. I rub the vanilla seeds and sugar between the fingers to ensure that the seeds are evenly distributed.

    LEMON SUGAR:
    To Make: (makes about 1 pound)

    3 large lemons
    2 cups granulated sugar

    Using a citrus zester, remove the zest. (Alternatively, using a paring knife or a vegetable peeler, remove the zest; then scrape as much of the bitter white pith off it as possible.) Roughly chop zest; transfer to a food processor, and add 1 cup sugar. Pulse until zest has been finely ground, about 3 minutes.

    2. Transfer the ground mixture to a medium bowl. Add remaining cup sugar, and toss until evenly mixed.

    3. Spread the lemon sugar on a baking pan, and let sit at room temperature until dry, about 1 hour.


    ROSE PETAL SUGAR:

    Substitute for plain white sugar in baking or beverages where you want a subtle rose flavor. Warning -- All roses that you intend to use must be edible and free of pesticides.

    1 cup white sugar
    2 cups fresh, fragrant, pesticide free rose petals, shredded or minced

    Pound sugar and rose petals with a mortar and pestle. Place in a covered jar for one week. Sift out petal bits if desired and store in an airtight container.

    INTERESTING FLAVORS: I have never tried this, but it will probably work (the same concept used when tinting sugar with liquid food colors):

    1. Place the desired amount of sugar in the plastic bag, add a small dab of flavored concentrated oils (they come in all flavors--go to http://www.penzeys.com --they have them)

    2. Close the bag and mix and shake until the flavor is evenly distributed.


    Flavored and Colored Sugars
    Source: Fooddownunder

    Method :

    * How to make flavored sugar
    * Flavored sugars are best made with granulated sugar. Place flavoring ingredients in the bowl of a coffee grinder used specifically for spices. Add 1/2 cup of the sugar and grind until fine. Pour the mixture into a bowl and grind the rest of the sugar. Add that to the bowl and stir. Store in an airtight container. The mixture will keep for 3 months.
    * If you want to give the mixture a little more texture, grind all the flavoring ingredients with a small amount of sugar. Then add that mixture to the rest of the sugar, which is left unground. Allow the flavors to blend at least 1 week.

    * How to make colored sugar: to color sugar, simply add gel or paste food color drop by drop to sugar in a zip-top bag. Start with 4 drops and increase the amount depending on how deep you want the color. Zip the bag and rub the sugar until the color is evenly mixed. If the sugar seems too damp, spread it evenly onto a cookie sheet and put in a 175 F oven for at least an hour, until dry. Store in an airtight container.
       
     Suggested combinations:
    Lavender: Grind 1 tablespoon of leaves and buds of English lavender with 1 cup granulated sugar. (Find the lavender at an organic nursery such as Redenta's Garden or Sticks and Stones Garden Market. Do not use lavender that is sold for making potpourri.)
    * Uses: Add to a cup of hot Pekoe tea or sprinkle on warm cookies.
       
    Vietnamese Mint and Lime: Grind 10 Vietnamese mint leaves with the zest of half a lime with
    * cup granulated sugar. Stir this into 1* cups granulated sugar. (You can use any type of mint, or try it with basil leaves.)
    * Uses: Use as a dip for fruit, add to iced tea or use in place of plain sugar in a sugar cookie recipe.
     
     Lemon Spearmint: Grind the zest of 1 small lemon, 10 spearmint leaves and 1 cup of granulated sugar.
    * Uses: Add to hot or iced tea.

     Chocolate: Finely grind 1 tablespoon cocoa, a tiny pinch of salt and 1 cup granulated sugar.
    * Uses: Stir into coffee or cappuccino. Sprinkle onto warm cookies or oatmeal.
      
     Orange-Orange Geranium: Grind three 1x1/8-inch strips of orange zest, 3 orange geranium leaves, 6 drops orange gel food coloring, a pinch of saffron and a little granulated sugar. Stir into at least 1 1/2 cups of granulated sugar. The saffron helps soften any sharpness from the orange flavors.
    * Uses: Substitute for sugar in an orange muffin or pound cake recipe. Use in herbal tea or serve with fresh fruit.
      
     Holiday Spice: Grind 1/2 teaspoon cinnamon, 1 teaspoon nutmeg and 1 cup granulated sugar and 12 frozen cranberries (optional) until fine.
    * Uses: Sprinkle onto oatmeal, a warm coffee cake, buttered toast or coffee.
      
     Red Hot: Grind 1/2 teaspoon cinnamon, 1/4 teaspoon cayenne pepper, 15 drops red gel food coloring and 1 cup of granulated sugar.
    * Uses: Sprinkle onto warm sugar cookies, stir into a cup of coffee or serve with fresh fruit.
    * Blue Vanilla: Grind the seeds of half a vanilla bean, 6 drops of blue gel food coloring and 1 cup of granulated sugar.
    * Uses: Substitute for sugar to make a truly blue blueberry muffin recipe; sprinkle onto buttered toast or oatmeal.
    ***************************************************************
    Flower Flavored Sugars
    Source: Recipegoldmine

    1/4 cup fresh flowers or leaves*
    1 cup super-fine sugar**

    Use only one type of flower or leaf in each batch of flavored sugar. Wash and dry the flowers or leaves carefully. In an airtight storage container, put in 1/4 inch of sugar, then a layer of flowers or leaves and alternate until the sugar is used. Cover tightly and store for three weeks. Strain out the dry leaves and pack the flavored sugar into a storage jar.

    * scented geranium leaves, lemon balm, various mints, lemon verbena, violets, rose petals (do not use flowers or leaves from where insecticide has been used)

    ** If you cannot find super-fine sugar, put granulated sugar in a blender and run for a few seconds.

    Hope you enjoy this recipes, I've tried a few myself and love them, so why shouldn't you?! Give it a try you surely wont regret it.

    see you soon xoxoxoxoxo

    Tuesday 6 December 2011

    Write On Plates How To borrowed from Broklyn Limestone/ I heart

    Hello again my sweet Craftys, I found this on my reading list on blogger and I knew I just had to share this with you guys, I mean it is really fab. and a great Christmas idea.

    So, today, I’m sharing my** Easy DIY Christmas Carol Plates with you (**all credit for the original concept must go to the super-talented Stephanie of Brooklyn Limestone from whom I stole kindly borrowed the idea).
    It’s a super-simple but high-impact idea that even those with the blackest of crafty thumbs can pull off with ease and style.
    { Writing on Plates Tutorial }
    Here’s what you’ll need:
    IMG_9612
      • Plates (I got mine for a dollar each at one of the many dollar store options in our area)
      • Porcelaine 150 pens
      • Painter’s tape (pardon my “tape lint”)
      • Holiday-themed stencil (mine is Martha Stewart)
    And that’s it. See? Easy-peasy?
    You’ll never guess how many steps there are. Check it out:
    1. Choose your stencil design and the placement on your plate. Then choose the color of Porcelaine 150 pen you want to use (available online or at Michael’s…use a 40% coupon there, and you’ll save yourself a couple of bucks), and fill in the design (the “bullet-tip” that I used for this process can be a bit touchy, so make sure you treat him nice, or he’ll bleed all over your plate, and you’ll have to wipe up the mess with a paper towel and start over…not that I would know anything about this).
    IMG_9595-1
    I chose the “ornament” stencil design and the carol, “Joy to the World”—classic and meaningful to me when I consider the wonder of Jesus’s birth and the way His love beautifies my life on a daily basis.
    2. Tape off a straight line to use as a guide for your text, and begin freehanding your carol lyrics. I only wrote on the raised portion of the plate, but you could continue writing all the way across if you prefer. Continue moving the tape down the plate as a ruler until you reach the bottom (you might be better at eyeballing “straightness” than I am and could do without the tape, but I tried that and, well, let’s just say that Mr. Paper Towel had to make his second appearance in 5 minutes).
    IMG_9593-1
    And…you’re done! Whoa!
    A two-step tutorial?!! Suh-weet!
    Oh, wait, I almost forgot…
    3. The Porcelaine pens are specifically designed to write on dishware, so it’s super-important to follow the baking (yes, baking) directions on the pen to “set” the ink on your plate surface or else the first time you stick it in the dishwasher, all of your hard taping + stenciling + lovely handwriting work will literally be washed down the drain (this didn’t happen to me, thank goodness!).
    Okay, so it was a THREE step tutorial. Still, not too bad, if you ask me.
    Ready to see the results?
    Well, all right then:
    IMG_9608-1
    Voila!
    A simple, elegant way to display your Christmas spirit.
    Oh, and if you want to actually eat off of your plates, I suppose you could do that too (but only after you’ve done the baking process…check, check).
    I used this concept to make a 16-piece set that I gave away as part of a big fundraiser I did last month, and I think they’ll work great as the actual dinnerware at a small Christmas party or family gathering:
    This also proves that white plates aren’t your only option, which should make you color-enthusiasts out there (yup, I’m a proud card-carrying member of that club…did you see my projects collage??!) happy!
    Well, that’s it for me today, folks! But I’d love to you have by either of my blogs for a visit and a chat (we bloggers love us some reader-comments, in case you haven’t heard! : ))
    Thanks again, Jamielyn, for having me! You are truly a gracious hostess (and a super-talented blogger)!

    Yummy Tomato Jam = gift

    Hello everyone.

     Here I am as promised, today is  "the day" for making this super yummy traditional (portuguese) tomato jam, I know you might be thinking WHAT?!!! TOMATO JAM yeahp and I dare to say  it again tomato jam, oh its just so good you won't regret making/trying/offering/ keeping some of it, its just so good..... Its close to heavenly in my point of view and palate of course, and you would never guess what .... yeah you knew it already IT'S DEAD EASY TO MAKE - oh and I almost forgot its super cheap too, so no bankruptcy for us yeiiiiihhhhh.

    So here it goes, you'll need:

    Ripe tomatoes (the bigger ones if possible)
    granulated sugar or jam sugar  ( its really up to you)
    lemon juice
    1 Cinnamon stick

    Peel, deseed and cut the tomatoes, drain the excess juice weigh the pulp and mix with an equal amount of sugar. boil with the cinnamon stick over a low heat stirring from time to time with a wooden spoon. when a small amount resembles jelly when dropped in a saucer the tomato jam will be ready, at the last minute add the juice of 1/2 a lemon ( for each kilo of tomatoes). Pour into sterilised jars, cover with jam wax discs and then the lid, turn them upside down for a while in order to create a vacuum, when all has cooled down decorate the jar with a fancy label and a fabric gingham cover if you so wish (its a gift right?!) put an rubber band on it and cover this with some ribbon and there you have it :D.

     And that's it really you decide the quantity of tomatoes to use and then you'll add  the same quantity of sugar, remember that we're trying to save you some valuable £ on Christmas gifts, so if you clean & sterilise previous used jars you're already saving £ and the more quantity you'll make the more jars it will fill and therefore more loved ones to share it with.


    To sterilise the jars after well cleansed and without the original labels put them in a tray on a oven at 140oC for +- 15 Min's

    The saucer test put a saucer in the fridge, remove it take the jam of the heat, then drop a teaspoonful of jam in the middle and put back in the fridge for 2 minutes,take it out and now pass your finger in the middle of the mixture if it keeps separated than it reached the setting point.

     Hope you liked this super easy recipe, and that you actually make it and give it a try; I'm sure you will just fall in love with it.

     See you soon.
    xoxoxoxoxoxoxoxo

    Monday 5 December 2011

    Home Made Nana's Oatmeal cookies

     Hello my wackys, and it is finally monday, christmas is really coming on faster and faster its lights everywhere windows decorated , shop windows decorated, christmas market stalls ohhhh I could go on and on about it.... have you put up your christmas tree yet?! I haven't but I have a pretty good excuse for that .... ready for it?! ... well I'm still waiting for my polymer clay order to make my Xmas tree ornaments with my girls, so has soon has it arrives together with the materials for my sweet wreath ( curious right?! - I know I'm so anxiousss too) I'll take some pics of mine cause an how to to make them are already on a previous post.... anyway  I'm afraid you'll have to wait for my pics for a wintsy bit ok?!!

     Well here's the 1st of many to come inexpensive Christmas gifts ideas:

    Oatmeal cookies, yeah you heard it and don't you dare twisting that sweet little button nose of yours ok I know they're old fashioned but it has a lovely light flavor; this recipe makes +- 18 large cookies so if you divide them by 3 (gift baskets, I'll explain a bit more about it later) it will give 6 amazing flavorful biscuits in each ;)

     1 1/2 cups of oats
     1 cup self raising flour
     1 1/2 teaspoons of baking powder
     1/4 teaspoon of salt
     12 tablespoons of softened butter
     3/4 cup dark brown sugar
     1 large egg
     1 1/2 teaspoons of vanilla extract
     1 table spoon of water
     1 cup coarsely chopped walnuts
     1 cup raisins

    How to:

     Preheat your oven at 180o C (350oF) with 2 racks evenly spaced. Now grab a bowl or use your stand mixer combine the oats flour, baking powder and salt, stir together; grab another bowl this time a bigger one using your electric mixer cream the butter until fluffy +- 1 minute slowly and while mixing throw in the sugar, when its all combined add the egg, the water and beat until thick and light 1 to 2 minutes +-, stir in the dry ingredients , the walnuts and raisins  in order to make a thick dough.

     Use 3 table spoons for each cookie patten to flatten it slightly, leave it in the oven for 15 minutes +- ( you need to have a peep every now and then, when they're golden on the sides they're done) let them cool for 3 minutes before placing them in absorbent paper  and transfer them to a cooling rack after 5 minutes.


     To gift wrap them they must and I can't stress this enough be completely cool.Place a piece of plain or patterned cellophane "paper" on top of your worktop, pile one on top of the other with a piece of baking/grease proof paper in between in the midle of the cellophane, twist it on the top put some tape to secure it and add some ribbon for decoration.

     And that's about it really. Hope you enjoy this  little wonders.

     Thank you for watching. and see you soon with another great recipe/ gift .

    xoxoxoxoxoox

    Sunday 4 December 2011

    Christmas Gifts 4 Family & Friends

    Heellloooo my wackys!!!! A very good morning to you all.

    Today we're going to talk about gifts yeahp, people spend fortunes and I really mean fortunes in this time of the year ... I mean you have to buy christmas decorations, gifts, food, table decorations and the all important drinks for many .... but I mean do we really have to spende a fortune at this time and then moan about it until the end of January?!

    What if  instead of buying something already made you would do it youself, I bet it's cheaper, granted it will give you more work, but, it will reaallyyy mean something to you and to the person you give it too, that's the beauty of Handmade, cause you're not just making something, no... you are spending your precious time, creativity, love and care on that little thing, so when someone actually receives it what you're giving them is the love and care you have for them and that makes your gift that little bit more unique and bespoke.

    I  mean, isn't it lovely to get something made specially for you by someone you like/love, remember we normally always keep the things that are handmade just for us, however the shop bought one will normally be in the bin sooner or later right?!

     Anyway, enough of blabering about gifts , lets get to the point that made you come to this post, so here it goes, here's just a few ideas of what you could make and offer your family and friends, this will be a list only and I'll post the how tos or recipes in the next following days :)

    • home made jam
    • home made chutneys
    • home made cookies
    • home made cake
    • home made liquors
    • home made flavoured sugar/ salt
    • handmade lavender freshners
    • handmade fabric covered wooden hangers
    • handmade personalised pillow
    • handmade loom knitted hat & scarf
    • handmade soft toy / plushie
    • handmade photo frames
    • handmade table runner
    • handmade personalised fabric napkins or placemats 
    • handmade memories photo box's
    • handmade photo blocks
    ...
    Has you can see the list is endless, and when you buy the materials or ingredients it will allow you to make more than one thing and being so you can actually give it to more than one person, for example if you're making the cookies you'll have to buy the flour, baking powder soft spread sugar vanilla or any other essence you'd like eggs baking paper etc. and to make it a gift you could simply wrap it in celophane plain or patterned and put a bow made out of ribbon and voila a present made of love and care just for the ones you love and care ;).

    The same applies to jam cakes and chutneys as well has marmalades, when you by the ingredients it will always and I really mean always make more than one jar so there you go, more than one gift, decorate the jar with a handmade label or printed one has you wish, put a patterned fabric covering the lid and voila again, you're offering your love and care once again, and isn't that what everyone wants?!
    someone that loves us and care for us, someone we could always count on, this little tokens mean that... they mean hey I'm here for you... 

     So you see my wackys there's no really need to spend huges amount of money when what we are reaally looking for has human beings is love.

     I hope I managed to inspire you, and help you in any way.

    See you soon my lovelies...
    xoxoxoxoxoxox

    Friday 2 December 2011

    "Christmas Is Coming To Town " tutorials

     Hi my wackys I know I'vent posted in a while and for that my honest and sincere apologies recently I started a job at the RM has a data key entry I'm doing the night shift which at the moment due to training is from 22.30pm to 05.30am then I have to get home and wake up at 7.30 so I can take my little "older" princess to school obviously my youngest wont let me have any sleep at all so here I am blogging my heart out today :).

     So today because its already the 2nd of December I decided to make your work/ hobby all the more easier I'm posting here some how to tutorials about many many thingies you can make for xmas, so have a peep at the tutorials, get some courage and inspiration and lets start crafting ok?!

     Me myself am going to do some Christmas stockings out of leftover fabric I have laying around, we'll see how it will turnout. ;)

     so for some really weird reason I haven't been able to post videos in a while so I'll leave with some links and images ok?! ****

    Xmas Stockings

    http://www.youtube.com/watch?v=NtLOTwbLaRg


    Candy Cane
    http://www.marthastewart.com/273608/candy-cane-mice?czone=holiday/marthas-easiest-christmas/save-time-and-money
     published by Martha Stewart


    polymer clay christmas ornaments


    Christmas Wreath / Advent                  http://www.youtube.com/watch?v=X8W6C_Tl9Ns&feature=related

     Ok so that's it for today I'll post some more tutorials soon.

     Hope you guys like it, and go on you know what I;m going to say don't you?! Yeahp that's right " come on my crafty wackys lets roll up our sleeves and lets get crafting"

    See you soon

    xoxoxoxoxoxooxox